Overview
A usable NVIDIA GPU environment is essential when learning CUDA. In practice, a local CUDA setup can be fragile due to driver–runtime mismatches, IDE/LSP configuration issues, and host architecture constraints.
This post documents a workflow that keeps local development lightweight and reproducible using VS Code + Dev Containers, while delegating GPU execution to Google Colab.
Prerequisites
- Basic VS Code usage and configuration
- Basic build concepts (compile, link, executable)
- Basic Jupyter Notebook and Google Colab usage
- Docker Desktop installed and running
Source code
Repository: GitHub
1. Dev Container for CUDA development (editing-first)
Goal:
- Provide a consistent environment for editing, navigation, formatting, and LSP
- Keep local GPU execution optional (GPU execution will be done on Colab)
1.1 Create the devcontainer directory
From the project root:
mkdir -p .devcontainer
cd .devcontainer
1.2 Dockerfile
Create Dockerfile (see also: Dockerfile):
FROM nvidia/cuda:13.1.0-devel-ubuntu24.04

# Prevent interactive prompts
ENV DEBIAN_FRONTEND=noninteractive

# Install dependencies
RUN apt-get update && \
	apt-get install -y wget curl git zsh sudo vim clangd && \
	rm -rf /var/lib/apt/lists/*

# Install Oh My Zsh
RUN sh -c "$(curl -fsSL https://raw.githubusercontent.com/ohmyzsh/ohmyzsh/master/tools/install.sh)" "" --unattended

# Force theme and plugins
RUN sed -i 's/ZSH_THEME=".*"/ZSH_THEME="robbyrussell"/' ~/.zshrc && \
	sed -i 's/plugins=(.*)/plugins=(git)/' ~/.zshrc

# Set Zsh as default
RUN chsh -s $(which zsh)
Notes:
- Base image:
nvidia/cuda:13.1.0-devel-ubuntu24.04 - Installs
clangdfor the VS Code clangd extension - The zsh setup is optional; remove it if you prefer bash
1.3 devcontainer.json
Create devcontainer.json (see also: devcontainer.json):
{
	"name": "CUDA Dev (Compile Only)",
	"build": {
		"dockerfile": "Dockerfile",
		"options": [
			"--platform=linux/amd64"
		]
	},
	"runArgs": [
		"--platform=linux/amd64"
	],
	"customizations": {
		"vscode": {
			"extensions": [
				"llvm-vs-code-extensions.vscode-clangd",
				"nshen.cpp-tools",
				"ms-toolsai.jupyter",
				"google.colab",
				"nvidia.nsight-vscode-edition",
				"NVIDIA.nsight-copilot",
				"GitHub.copilot",
				"GitHub.copilot-chat"
			],
			"settings": {
				"C_Cpp.intelliSenseEngine": "disabled",
				"clangd.path": "clangd",
				"clangd.arguments": [
					"--compile-commands-dir=${workspaceFolder}",
					"--background-index",
					"--header-insertion=never"
				],
				"terminal.integrated.defaultProfile.linux": "zsh"
			}
		}
	},
	"remoteUser": "root"
}
1.4 Why linux/amd64
On Apple Silicon (ARM), CUDA images and related tooling can have compatibility issues. Pinning the container to linux/amd64 tends to be more predictable.
1.5 Start the container
In VS Code:
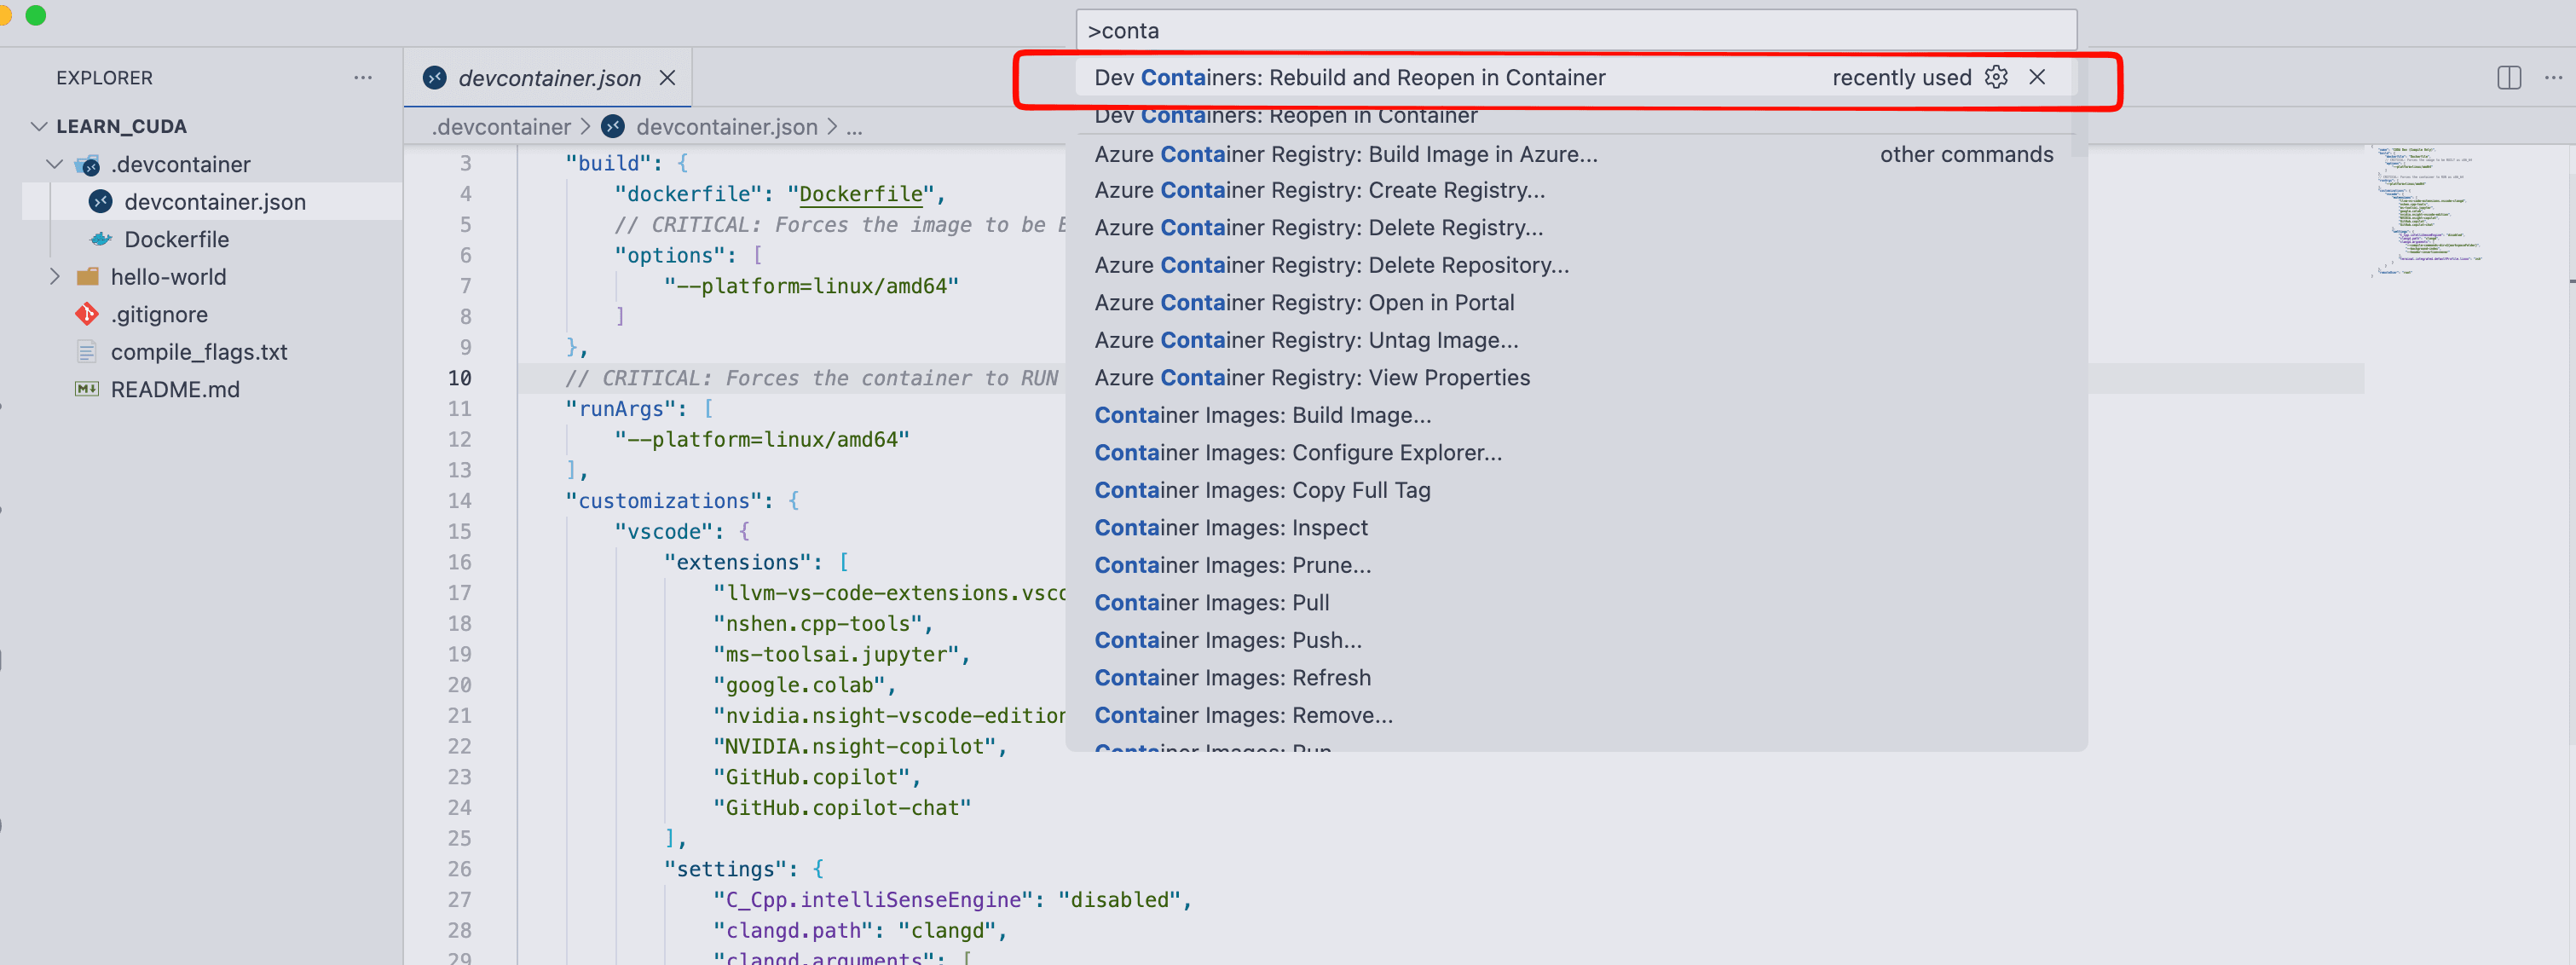
Cmd + Shift + P- Dev Containers: Reopen in Container
Make sure Docker Desktop is running on macOS.
2. Minimal CUDA example
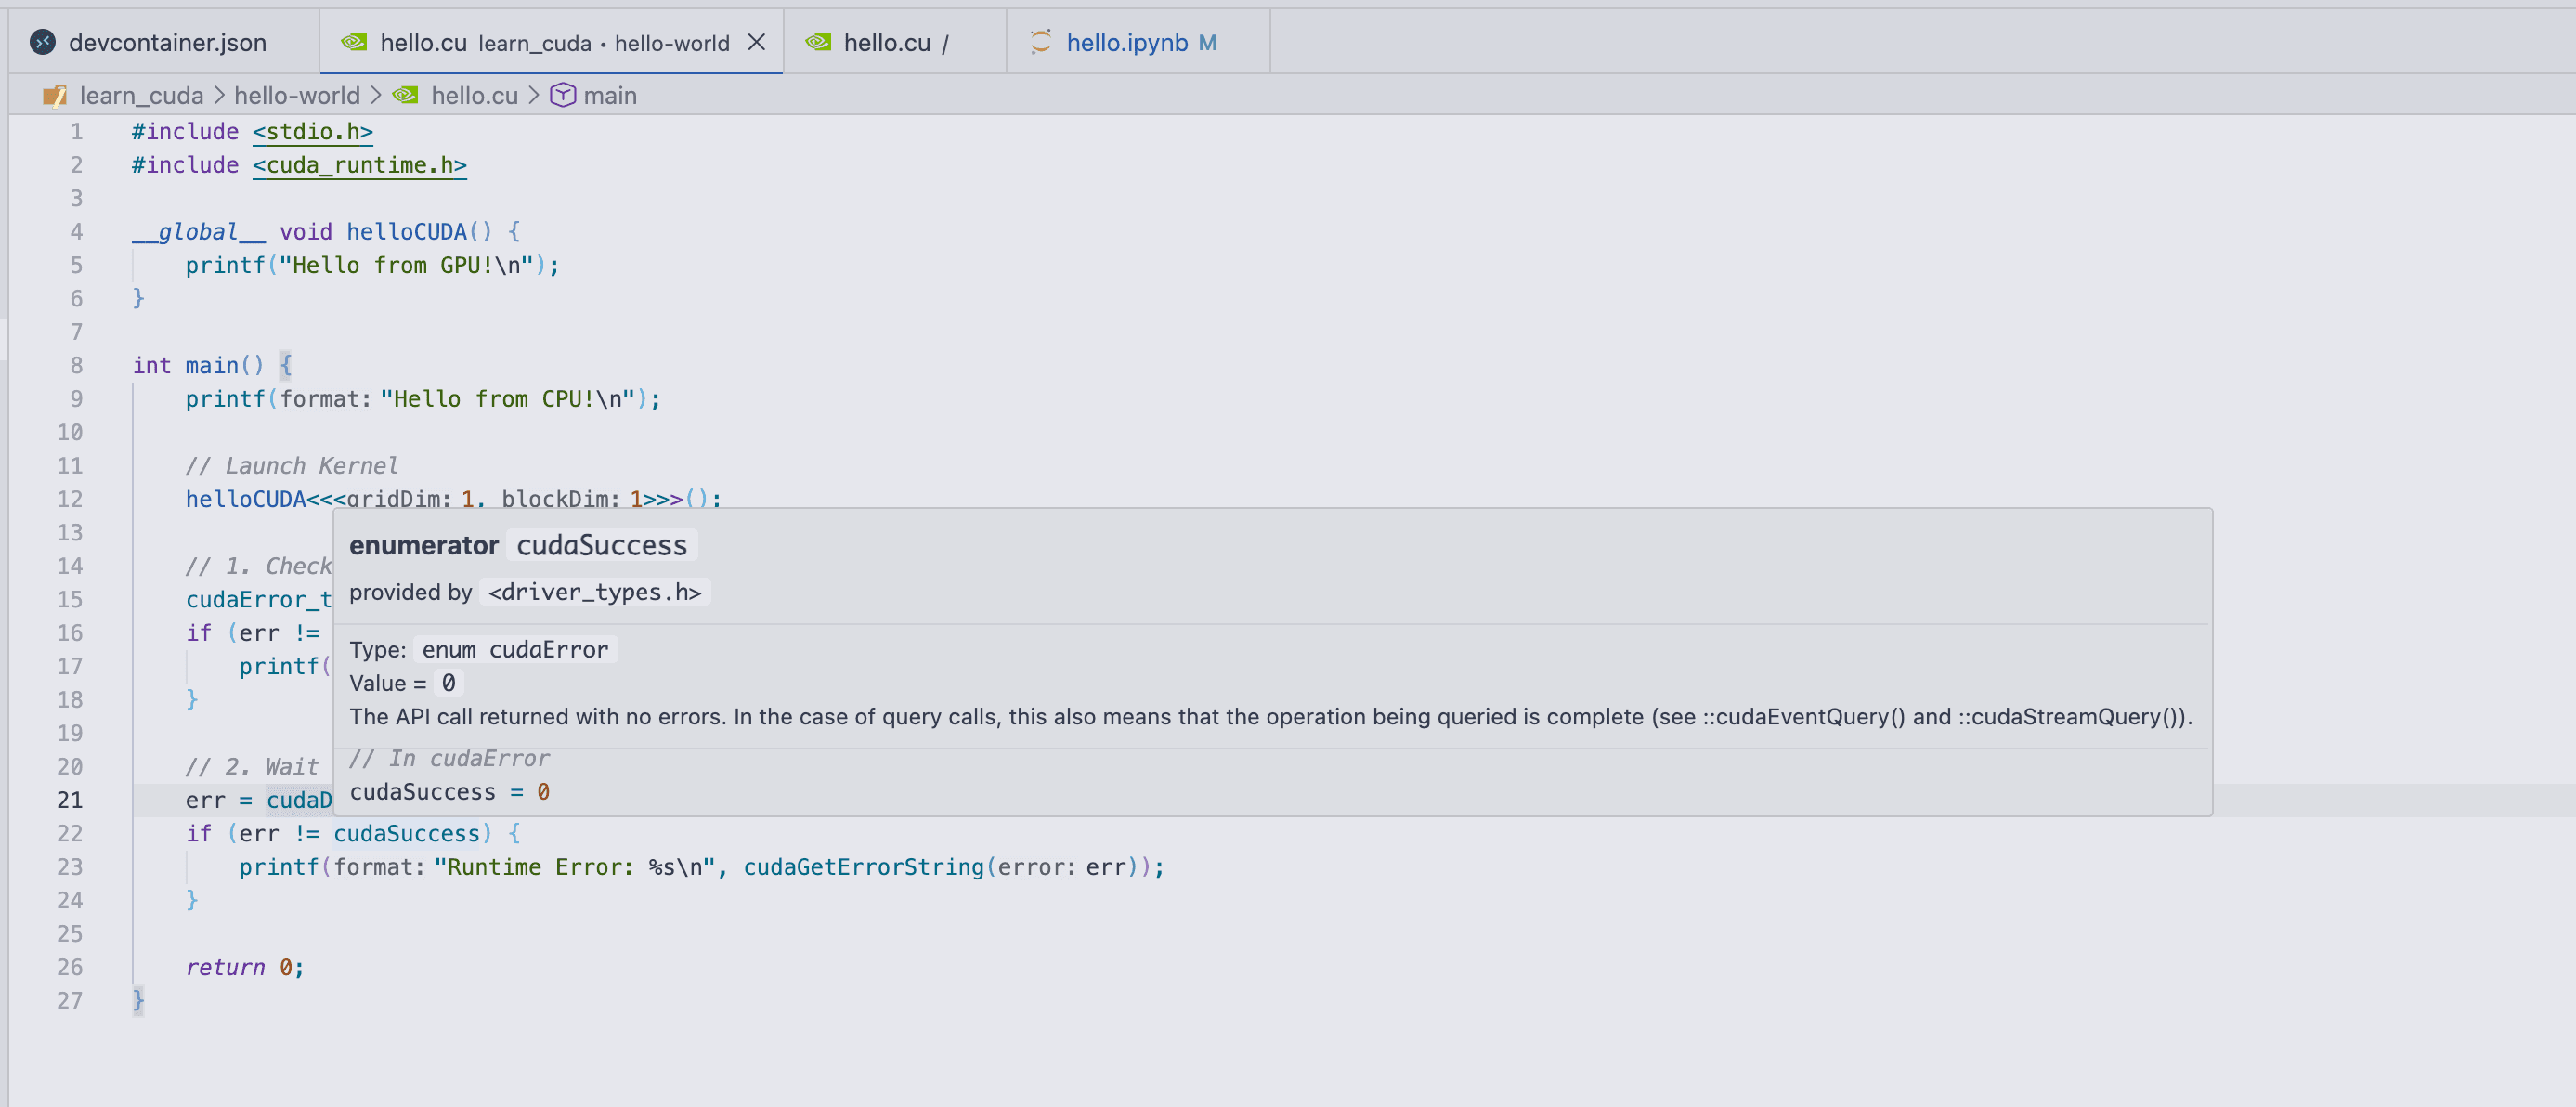
Create hello.cu (see also: `hello.cu`):
#include <stdio.h>
#include <cuda_runtime.h>

__global__ void helloCUDA() {
	printf("Hello from GPU!\n");
}

int main() {
	printf("Hello from CPU!\n");

	helloCUDA<<<1, 1>>>();

	cudaError_t err = cudaGetLastError();
	if (err != cudaSuccess) {
		printf("Kernel Launch Error: %s\n", cudaGetErrorString(err));
	}

	err = cudaDeviceSynchronize();
	if (err != cudaSuccess) {
		printf("Runtime Error: %s\n", cudaGetErrorString(err));
	}

	return 0;
}
Compile and run:
nvcc ./hello.cu -o hello.out
./hello.out
If the container is not attached to an NVIDIA GPU, you will typically see:
Hello from CPU!
Kernel Launch Error: CUDA driver version is insufficient for CUDA runtime version
Runtime Error: CUDA driver version is insufficient for CUDA runtime version
This is expected: locally the container is primarily for editing/LSP and the CUDA toolchain; GPU execution is handled on Colab.
3. Compile and run on Google Colab
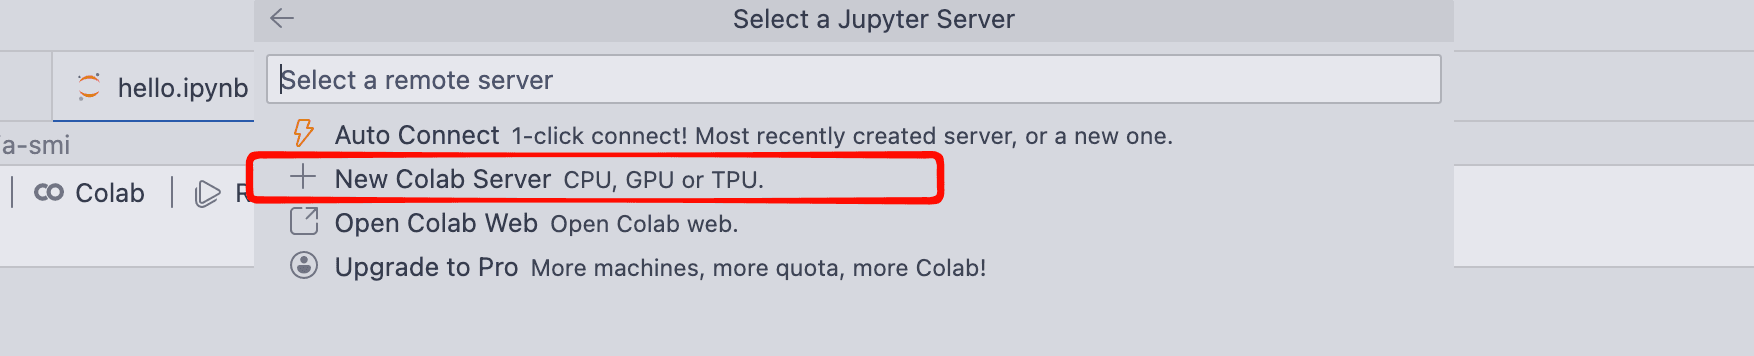
3.1 Create a notebook and select a Colab kernel
Create hello.ipynb and select a Colab kernel in VS Code.

Select a GPU runtime (e.g., T4):
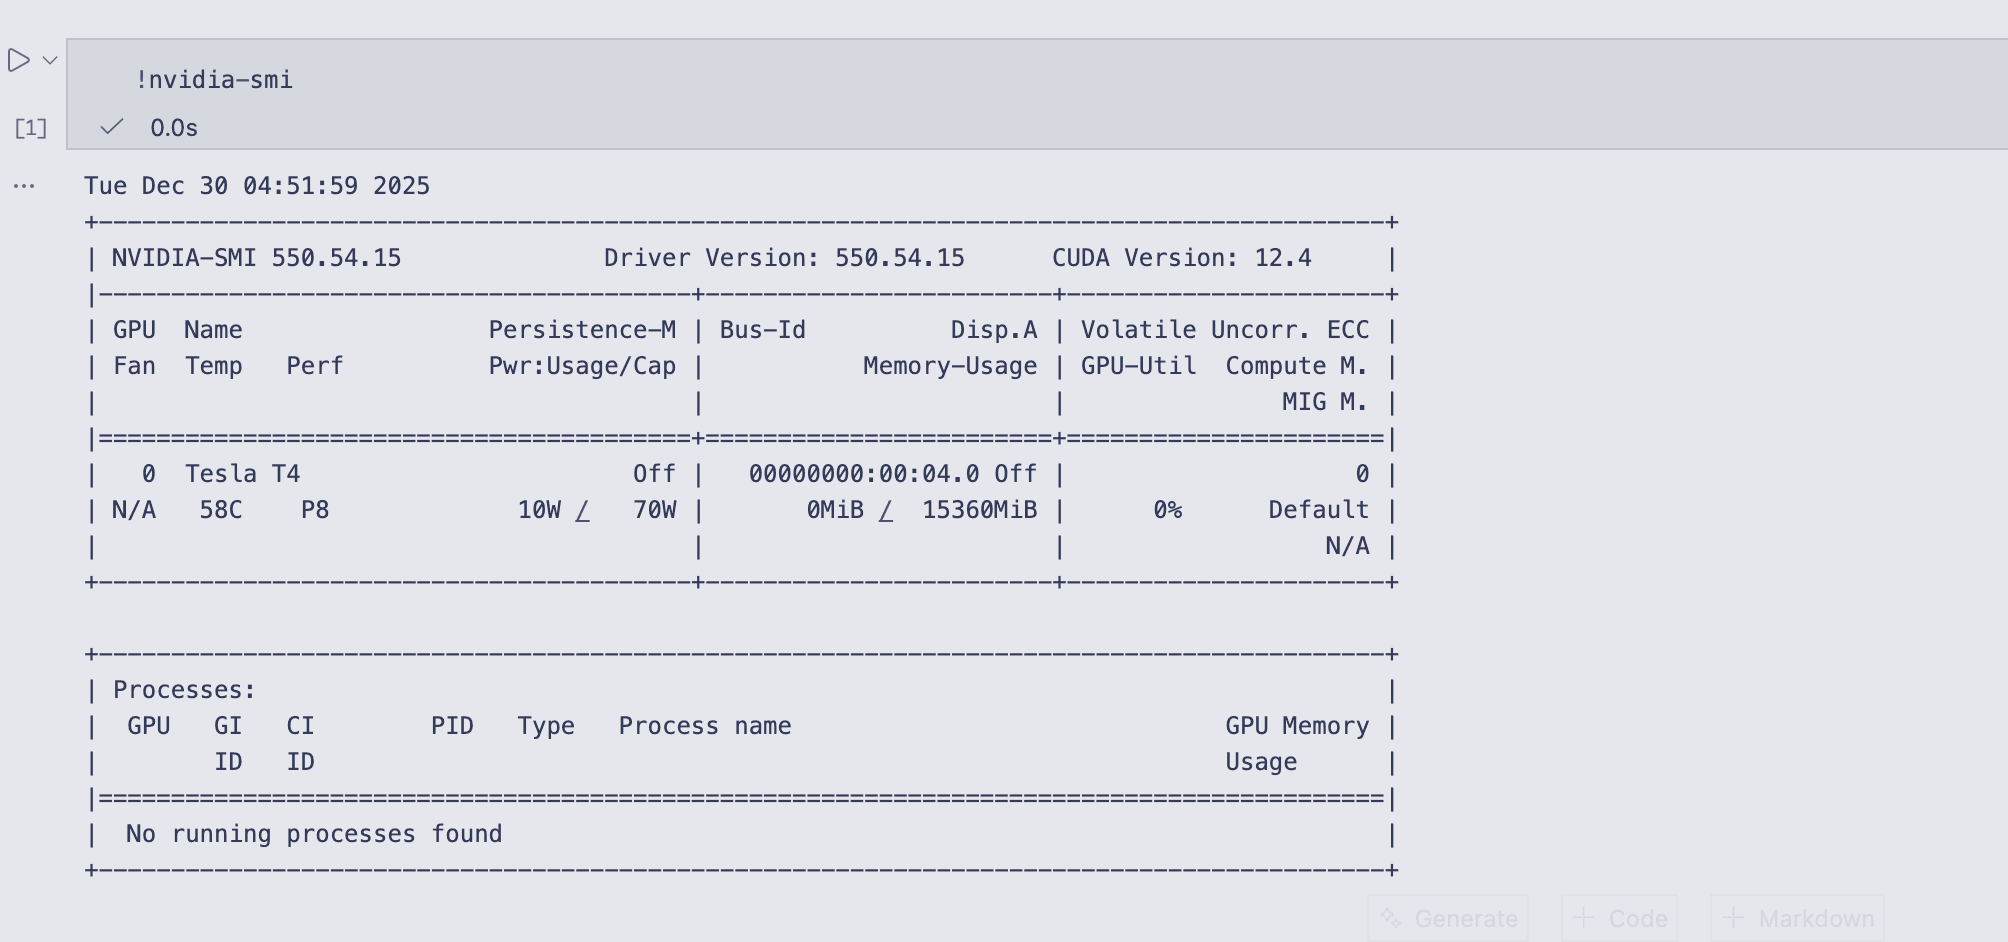
Verify the session reports GPU information:
3.2 Attach the Colab filesystem
Attach the Colab session filesystem to the current workspace:

The dev container may reload. After reload, re-select the same Colab kernel/session.

Once attached, the Colab filesystem will appear in the file explorer:
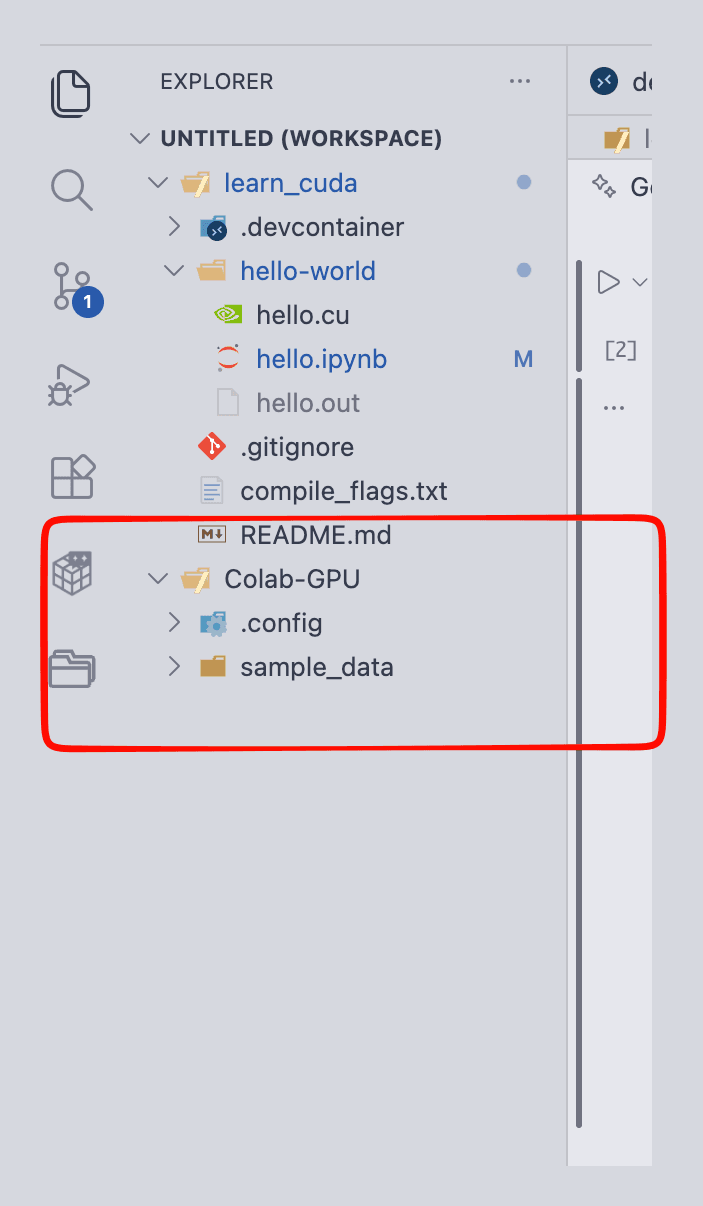
Copy hello.cu into the Colab-side directory, or pull code in the notebook via git clone / curl.
3.3 Build and run
Example workflow:
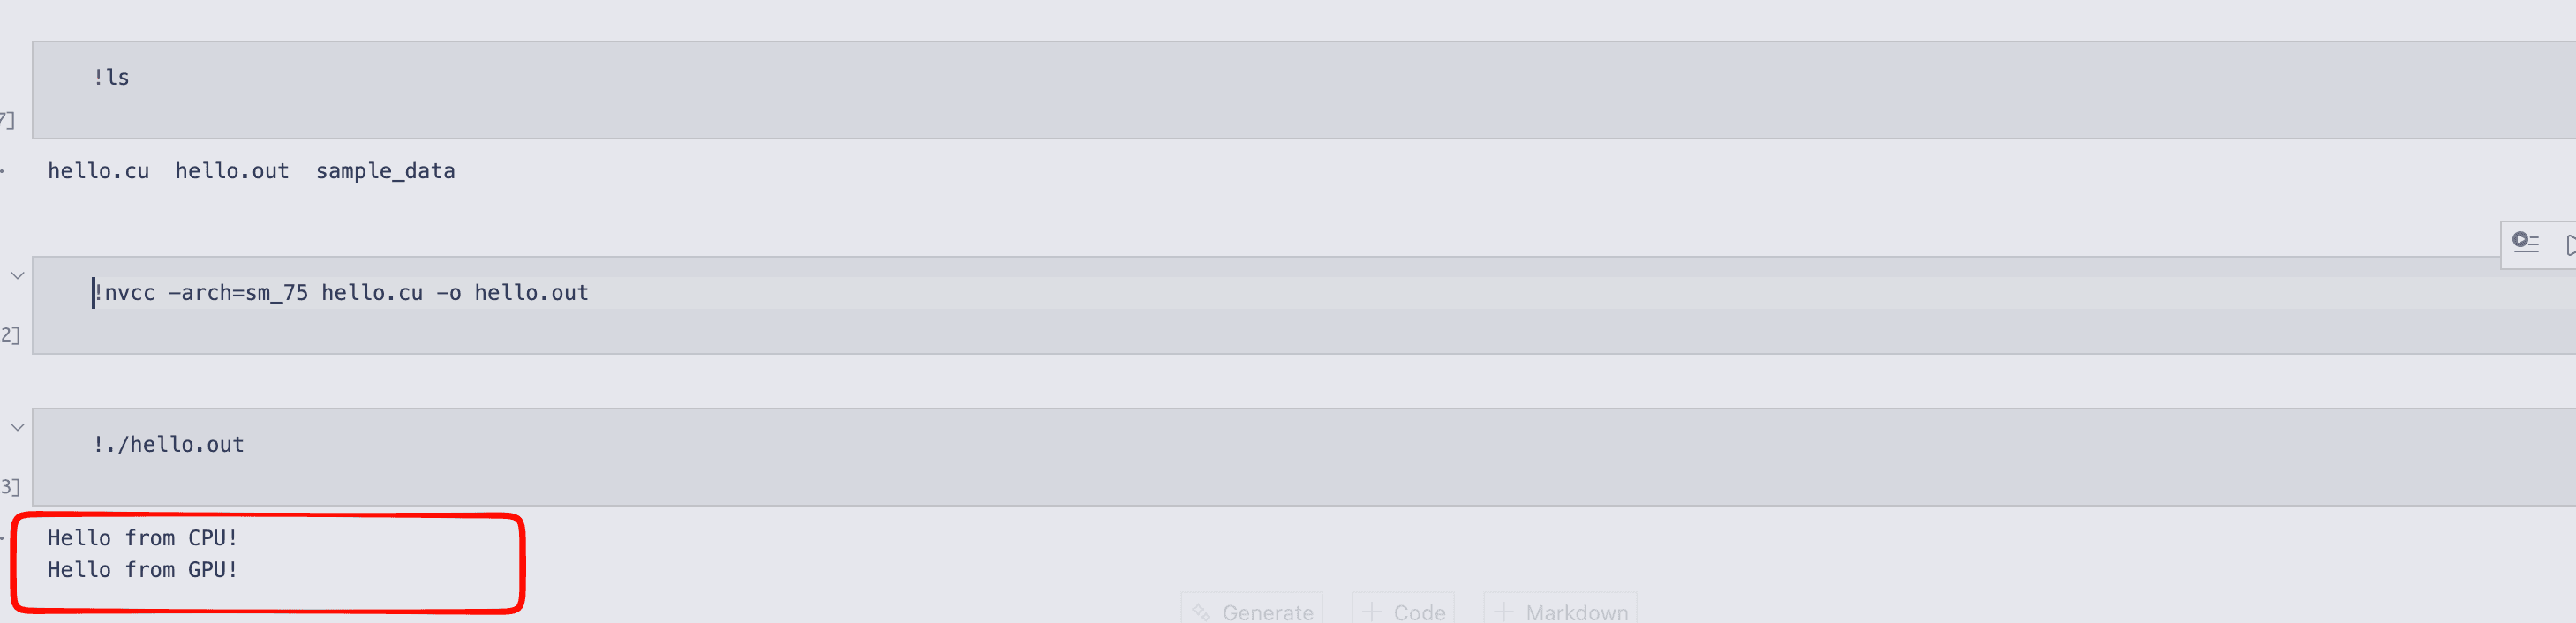
Compatibility note: CUDA toolkit vs driver mismatch
At the time of writing (2025-12-29), Colab may expose a CUDA toolkit version that is newer than the driver on the underlying GPU host, which can break a default build.
A practical mitigation is to compile for the target GPU architecture explicitly (T4 is sm_75):
nvcc -arch=sm_75 hello.cu -o hello.out
./hello.out
If you do not specify an architecture, you may see errors similar to:
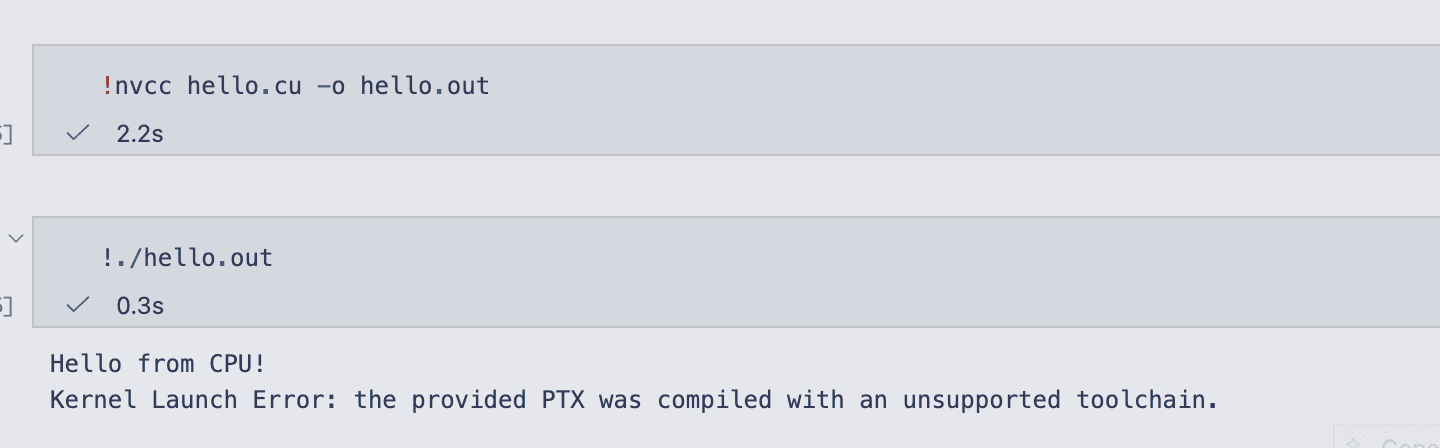
4. Summary and limitations
This workflow decouples local development from GPU availability: local containers provide a stable editing experience, while Colab provides on-demand GPU execution.
Limitations:
- Colab environments change over time; build flags may require occasional updates.
- Dev container reloads and kernel re-selection can be disruptive.
- Free GPU availability and quotas are not guaranteed.